GEOCODING
In this section, we'll explore QGIS' geocoding capabilities to geocode hospital locations in Chicago.
PREPARE AN ADDRESS FILE
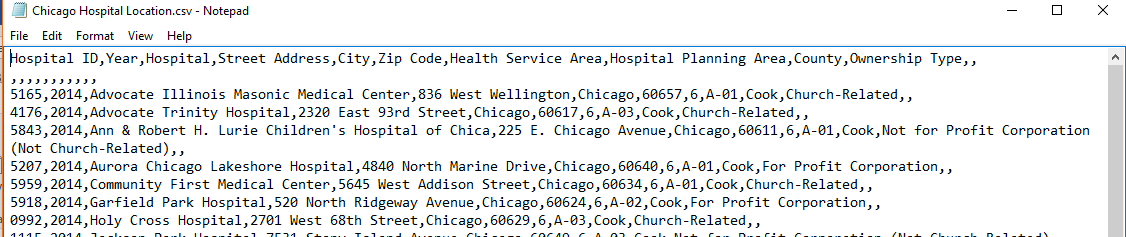
For this workshop, we'll use Chicago Hospital Location.csv file.
- Open your file in WordPad. It should look like this:
INSTALL THE MMQGIS PLUGIN
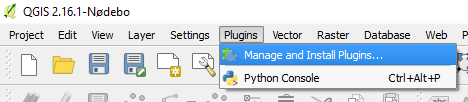
- In order to geocode addresses from a CSV file, you will need to first install the plugin MMQGIS
MMQGIS is a set of Python plugins for manipulating vector map layers in Quantum GIS. Originally created in 2009, MMQGIS includes Geocoding as well as Geometry Conversion, Cluster ("Hub") Analysis, Animation and many other features, including basic vector processing operations that are sometimes used as an alternative to the original native QGIS vector plugin set and to Sextante, another plugin that has become a core feature..
- To install the MMQGIS plugin, select Plugins –> Manage and Install Plugins from the menu bar
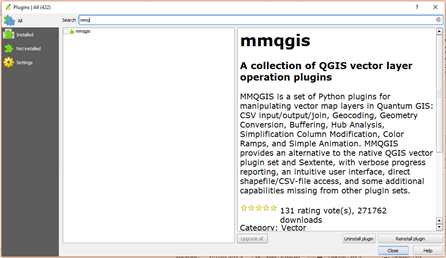
- This loads the Official QGIS Plugin Repository where a list of plugins is available. Select MMQGIS for installation from the search bar at the top or by scrolling down the alphabetical list of plugins. Check the box next the mmqgis and then click on the install plugin button.
GEOCODING AN ADDRESS FILE IN QGIS
Now that the plugin is installed, you can access the Geocoding function:
- Click on MMQGIS –> Geocoding from the top menu bar.
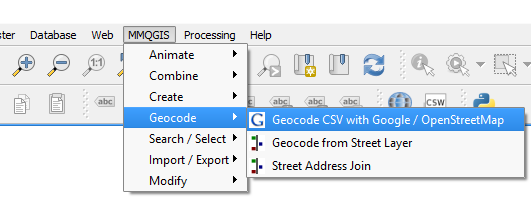
There are two geocoding options: one for geocoding your address file using either Google or OpenStreetMap geocoding web services or by geocoding from a street layer. For this example, the address file will be geocoded using Google Maps. Geocoding using one of the web service options will require an Internet connection.
Note: there is a 2,500 record limit within a 24-hour period when using Google’s service.
- Once the “Geocode CSV with Google / OpenStreetMap” option has been selected, a window for the Web Service Geocode opens. From the window, load the CSV file.
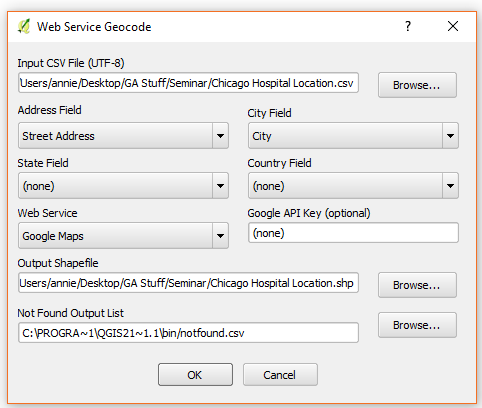
You will need to have a column for the address, a column for the city, and a column for the state (for US records) and/or a column for the countries. The first line of the CSV file should contain the column names with each separated by a comma. The second and all subsequent lines contain the records for that file with each column again separated by a comma.
- Set the parameters for geocoding
- select from each section the street address, city, state, and country columns in the CSV file that match.
- For web service, pick the desired geocoding service.
- Set the location for the resulting shapefile
- You also need to designate a CSV file that will record any records that were not able to be geocoded. Failure to do so will result in an error.
- Once you have set all the parameters, hit the “OK” button to start geocoding.
The length of time for geocoding depends on how large your file is. Bases on previous attempts, we estimated that it would take a minute for a 50 record file.
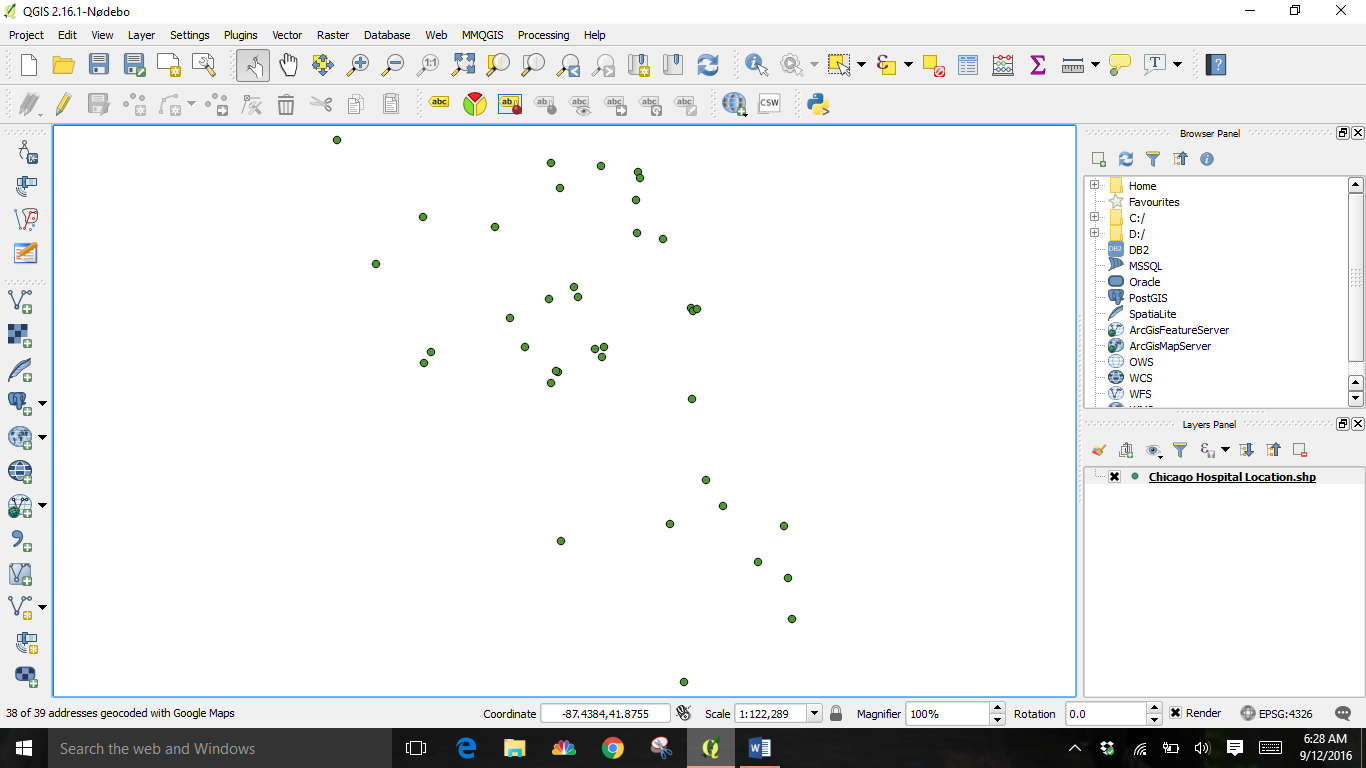
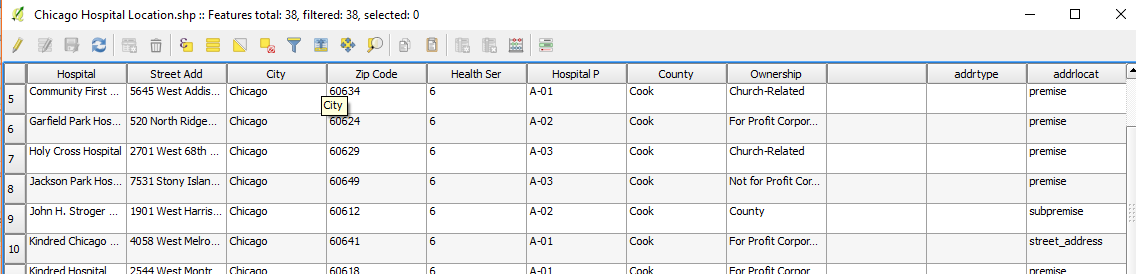
- Once the geocoding is finished, the end result is a geocoded point shapefile. Appended to the table are two columns that describe how each point was determined.
1. addrtype: is the Google <type> element or OSM class attribute that indicates what address type it is (street, route, etc.)
2. addylocat: is the Google <location_type> element or OSM type attribute that indicates the relationship of the coordinates to the addressed feature (rooftop, geometric center, interpolation, etc.)
For more information on geocoding in QGIS:
https://plugins.qgis.org/plugins/mmqgis/ - the official plug-in documentation
http://michaelminn.com/linux/mmqgis/ - from the man who wrote the plug-in.