How do I request access to Banner INB?
The Access Request form was created to provide one location for users to request access to the ERP systems at Eastern Illinois University. The form can be found on the ITS Forms page. This document is a brief user guide for filling out the request form.
  |
|
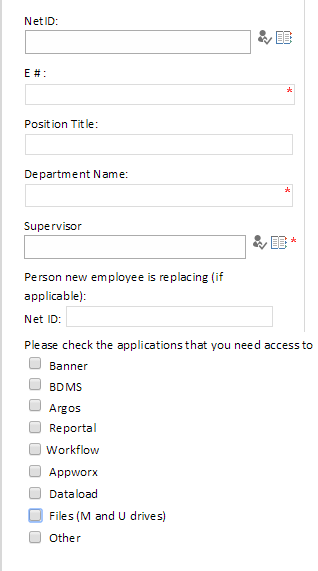
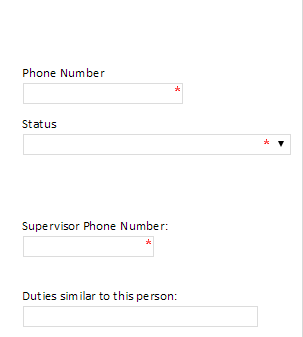
Any of the check boxes which are checked for #7 will add additional fields to the form. These fields ask for specific information for each of the systems access will be granted.
Banner
- Input the Dean/Dept Chair/Director’s NetID which will need to approve the access. Pressing the catalog icon will open a new window. In that window you can search for a user’s NetID by using their full name.
- This drop down defines if the request is for a new account, modifying existing account, or removing access.
- This a comments box which should be used to describe the type of access the user will need to have.
- Check the boxes for each of the modules the user will need to have access.
- Check the boxes for each instance the user will need to have access.
BDMS, Argos, Reportal, Workflow, Appworx
For each of the above applications the form will ask for the same type of information.
- It will ask whether the user needs access to Test or Production. Check one or both of the boxes depending on the required access.
- There is a comments box which needs to describe the type of access the user will need to have.
Dataload, Files (M and U drives), Other
For each of the above applications the form will ask for the same type of information.
- The form will provide a comments box. Please provide the full path to the folder or file the user will need to have access. If you are unsure of the full path please provide as much information as possible to assist in granting the appropriate access.
Once you have filled out all of the required fields on the form scroll to the bottom and press submit. You will see several approvals depending on the type of access which was requested. You will not need to do anything for these fields as it pertains to the approval process once the form has been submitted.
Approvals
Supervisors
After submission the supervisor will receive an email requesting that they approve the access for the user. By clicking on the link in the email the supervisor will be able to review the entire form and make modifications if needed. If everything looks correct the supervisor can input their email address under the Supervisor Approval heading. They will need to also input the date and their phone number. After providing this information they will need to press Submit.
Dean/Dept Chair/Director
After the supervisor has approved the request an email will be sent to the user defined in the Dean/DeptChair/Director field. By clicking on the link the user will be able to review the form and make modifications if needed. If everything looks correct the user can input their email address under the Dean/DeptChair/Director Approval heading. They will need to also input the date and their phone number. After providing this information they will need to press Submit.
Data Custodians
After the above two users have approved the request an email will be sent to the Data Custodians. A Data Custodian will receive this email if the request is for data which they oversee. If everything looks correct the user can input their email address under the Data Custodian Approval heading. They will need to also input the date and their phone number. There is an additional comments box for the Data Custodian to add notes for Information Security. This is the location for the Data Custodian to list security class, ect. After providing this information they will need to press Submit.
If the requested access is not appropriate or will not be approved please state the reason for denying the request in the Data Custodian comments field. Then enter you email address in the signature field to sign and date the request. This will allow the request to finish gathering the necessary approvals for the other modules. Information Security will review the request and only grant access for modules which have been approved by the Data Custodian
User
After the supervisor has approved the access the user which the access is being requested for will receive an email. This email provides a link to the Confidentiality Agreement and Privacy statement for the University. The user will be required to acknowledge and accept each of the statements. Once the request has been approved and the access granted by Information Security the user will receive a final email stating that the access has been granted. Additional information will be provided to the user at this time.