Using Stream to Create a Caption Video File for Use in Kaltura
This How-To is about using Microsoft Stream to create a downloadable caption file for use in Kaltura. It assumes you have a local copy of a video (narrated PowerPoint or another video). If you have previously uploaded the video to Kaltura and no longer have a local copy, contact your Instructional Support Specialist (ISS) for a download link to your Kaltura video.
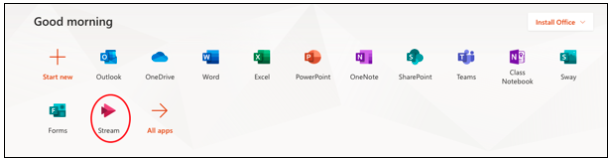
STEP 1
Open Panthermail and click on the Stream icon. If the Stream icon isn’t showing, click the All Apps icon and then choose Stream.
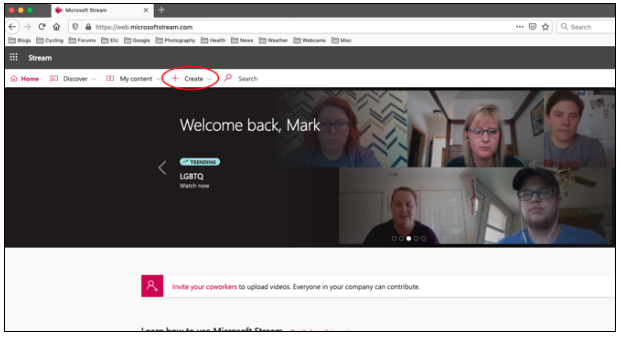
STEP 2
Click on the Create button in Stream.
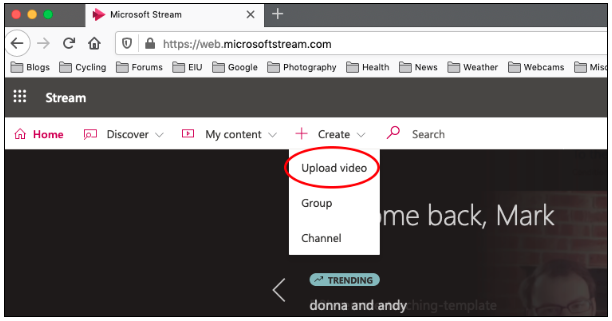
STEP 3
Click Upload video.
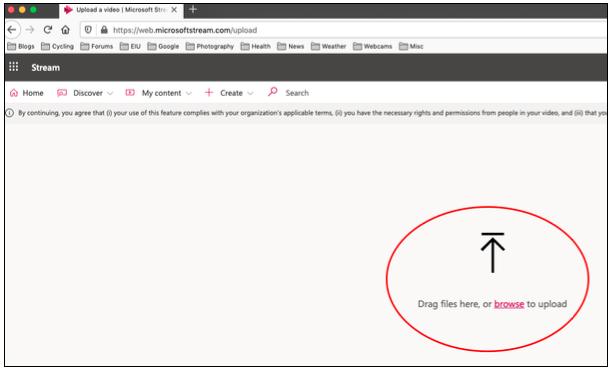
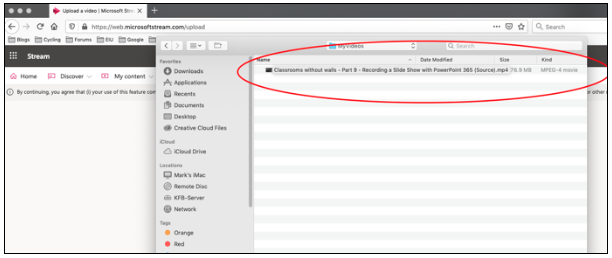
STEP 4
Browse to find your video file. You can try dragging the file into Stream but browsing to find it usually works better.
STEP 5
Choose your video and click Open. This shows a Mac file system, but Windows is similar.
STEP 6
Once your video begins to upload, you’ll see a progress counter. There’s no need to wait for that to reach 100%. You’ll receive an email once your video is fully uploaded. Click the Options button.
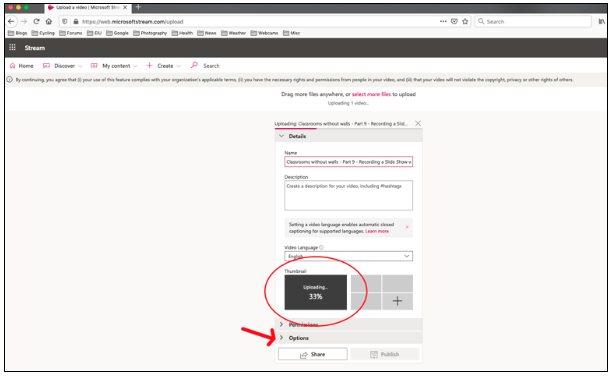
STEP 7
By default, your upload should autogenerate a caption file.

STEP 8
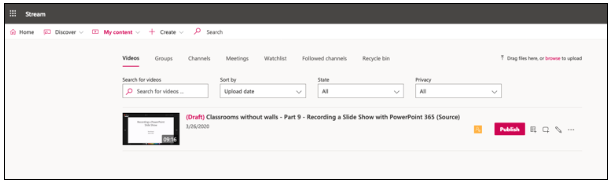
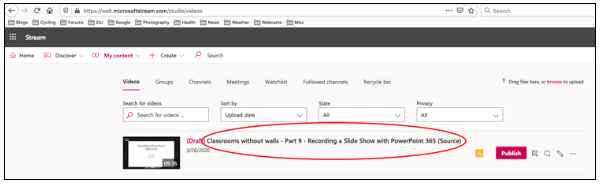
Click on My content and choose Videos.
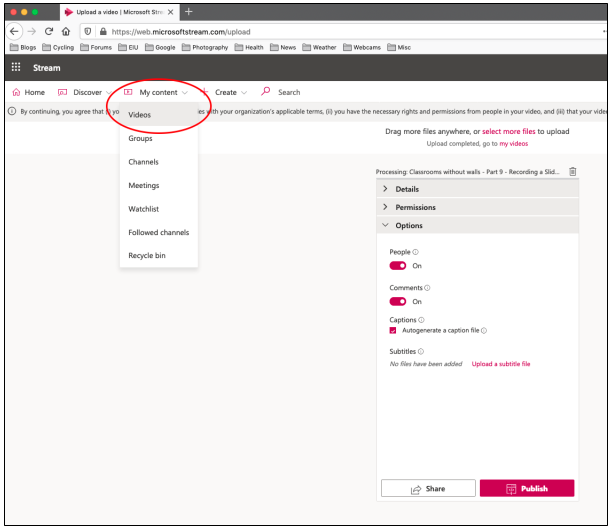
When your video is finished processing, it will show up here.
STEP 9
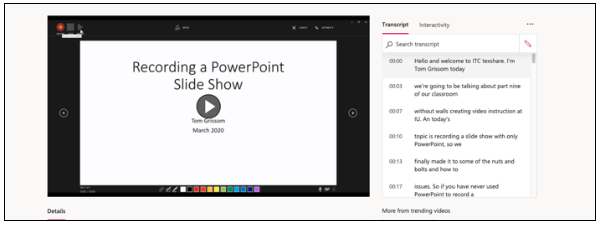
Click on the video title.
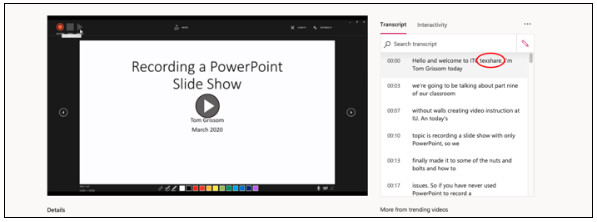
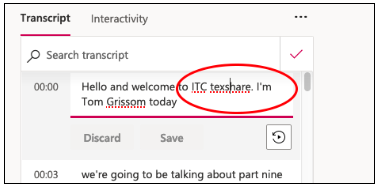
A page will open with your video in a player and the captions to the side.
With this particular video example, the word Techshare is incorrectly captioned as “texshare.”
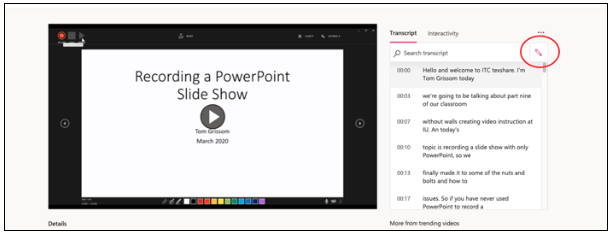
Note: There are two ways to fix errors in the autogenerated caption (for Step 10 to Step 12).
Option A
STEP 10
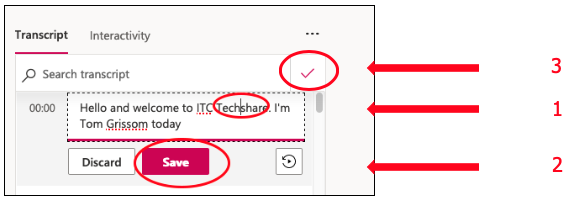
To fix the error, click the pencil icon in the upper right.
Then click in the text box on the word that needs to be corrected.
Make the correction and then hit the Save button, and then the check mark. Repeat that process until your captions are correct.
STEP 11
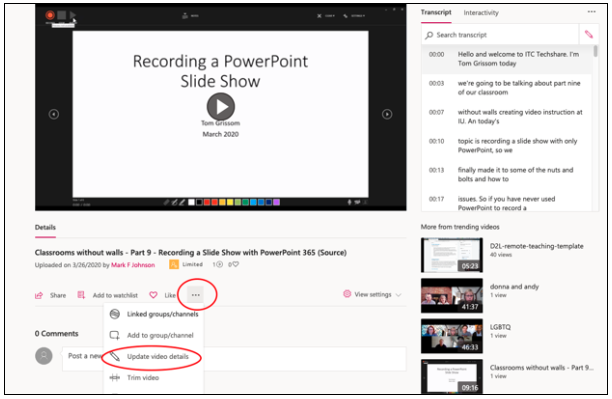
Once you have made all the corrections needed, click on the ellipsis (…) and then Update video details.
STEP 12
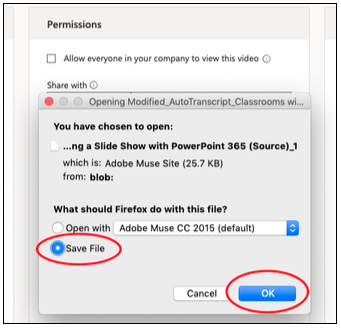
Click Download file.
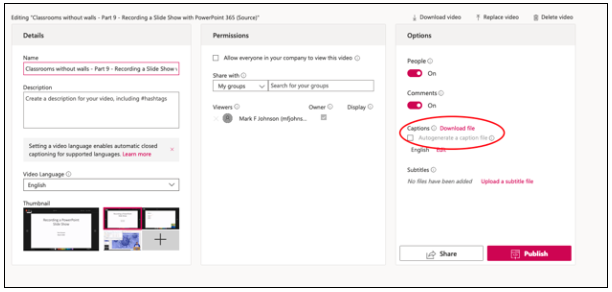
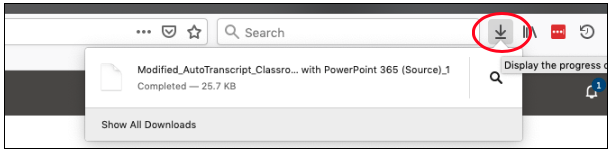
And Save to your computer (it may save to your Download folder, if so you may want to click on the download icon from your browser to find it).
Option B
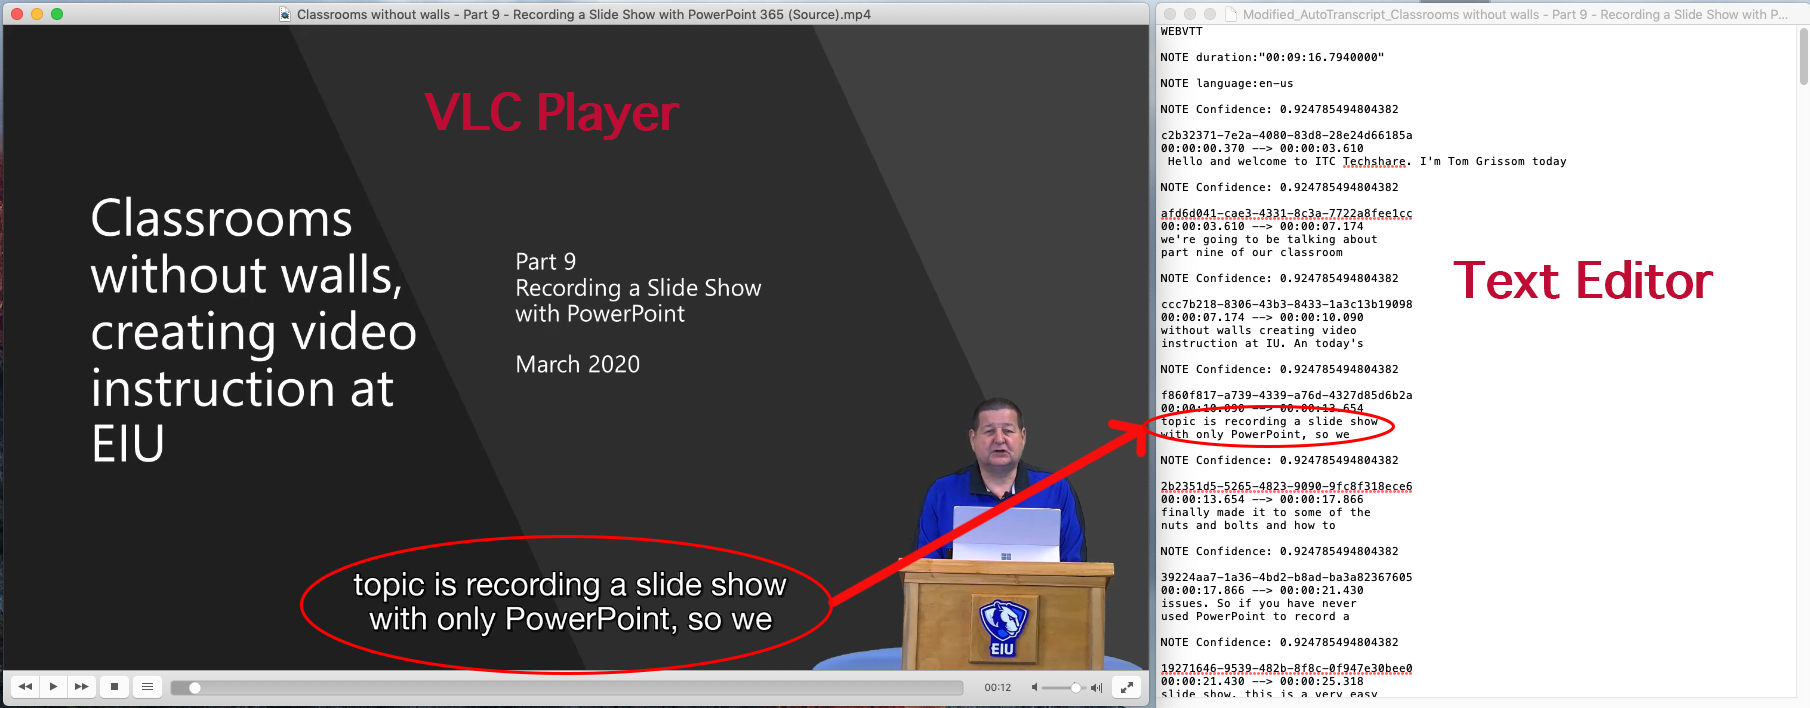
As we've worked more with Stream for captioning, we're finding that it may be easier to let Stream create the caption (VTT) file, then download that file and edit it in a text editor like Notepad or Apple's TextEdit. You can watch/listen to your mp4 file in a player like VLC or QuickTime while you follow along in the text editor. When you find an error, simply pause the video and make your corrections in the text editor, then resume the video. When you're done, just save the VTT file and send it to your ISS. The built-in Stream editor is ok, but it's more click-intensive than using a normal text editor, we've found. Of course, you're free to use either method. This is just an option we think might be easier.
STEP 13
Send that file as an email attachment to your Instructional Support Specialist (ISS). Then upload your original video to Kaltura as usual. Your ISS will attach the caption file (called a VTT file) to your video in Kaltura.